The following SharePoint 2010 CodePlex projects have helped me creating wonderful solutions for my clients. Here are the ones that stood out for me (so far):
SharePoint Manager
Overview:
The SharePoint Manager is a SharePoint object model explorer. It enables you to browse every site on the local farm and view every property.
Comments:
First and foremost! Indispensable, and a must have for every SharePoint developer and administrator.
SharePoint Developer Tools for Visual Studio 2010
and
CKS: Development Tools Edition
Overview:
This project extends the Visual Studio 2010 SharePoint Project system with advanced templates and tools.
Comments:
Attended an SharePoint evangelism by Wouter van Vugt a couple of years ago, and have been a keen user of CodeCounsel's Visual Studio tools ever since. Highly recommended!
SharePoint 2010 Fluent Ribbon API
Overview:
An API that lets you create Ribbon buttons for application pages and even contextual ribbon buttons for WebParts.
Comments:
Wow, if you're involved with custom application building for SharePoint as much as I am, this was a true blessing in disguise. Very easy to understand, and simple to use.
Documentation :
http://markeev.com/sharepoint/ribbon/
http://amarkeev.wordpress.com/2012/01/06/sharepoint-ribbon-togglebutton/
MiniCalendar Web Part
Overview:
A small web part to display links to events stored in a list (or document library) in a mini calendar (in month view mode).
Comments:
Really simple little webpart. Gave us a great head-start in creating a mini calendar that we could use in a masterpage.
SharePoint Property Bag Settings
Overview:
The Property Bag Settings can store any metadata as Key-Value pairs. This SharePoint administrative application page(s) provides a hierarchical configuration manager that can safely store and retrieve configuration settings at Farm, Web, Site Collection, Site and List level.
Comments:
Simple and clean interface lets you easily manage the Property Bag. Becomes very useful once you start building custom applications within the SharePoint platform.
SharePoint Batch Edit
Overview:
A Bulk an Batch updating for list and document properties. The ribbon button makes it possible to update multiple items with a single click, supporting the common used column types like Managed Metadata, Enterprise Keyword, People Picker and many more.
Comments:
As the description says on the site, "wonder why this wasn't-in-the box". I've extended mine with ability to select a content type, if the list has more than one.
Starter Master Pages for SharePoint
Overview:
Starter Master Pages for SharePoint are a clean, commented starting point for creating your own SharePoint 2010 branding.
Comments:
It's done by Randy Drisgill... Need we say more?
Wednesday, August 29, 2012
Tuesday, August 28, 2012
Programmatically create a SharePoint XsltListViewWebPart, with Cross-Site support
Since I've found a few very helpful pieces of code this week, including the SharePoint 2010 Batch Property Edit control, that my friends of Tam Tam generously uploaded to CodePlex, I though that I'll share the XsltListViewWebPart that I've recently built for a client of ours.
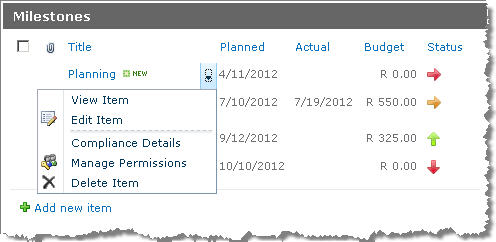
After Googling for days it seemed, I couldn't find a good example of a programmatically created XsltListViewWebPart. Below I'll share a few thoughts on what I did to get the control up and running. I've also added the functionality to display a "Add new item" link, the same way the OOTB SharePoint List WebPart does.
Although by no means perfect, I hope this does help someone in desperate need of answers. Remember, this is not a copy-paste exercise, but a gentle nudge in the right direction!
Public and Private properties
Nothing too special here. Give the user the ability to select a Web, List and View combination, plus the option to show or hide the "Add new item" link.
TIP: I've tried setting the XSL Link on a OOTB SharePoint list web part, but it doesn't seem to work!? Is it just me or does anyone else have issues with this? By rendering this custom XsltListViewWebPart and setting its XslLink property I could get the XslLink rendering working. But not the OOTB list web part?
UPDATE (01/10/2012) : The problem (bug if you will) with using the XSL Link on a List Part, is better explained over at Glyn Clough's blog. Just follow the these two links.
Overrides
The only real override to take note of, the the CreateChildControls method. Here I use a few helper functions to render all the plumbing necessary for the SP.UI.ModelDialog. This is needed to display the "Add new item" dialog. I've used a series of fixed values, but obviously you can make them all dynamic and have the user set them in your EditorPart.
Helper functions
I've included the SP.UI.ModelDialog helper functions. They're all but perfect (but works!), so feel free to dice and slice them according to your own needs. Again I've included them just to give you an idea of what I've done.
Private methods
So here comes the juicy bits. First its important to notice that the CreateXsltListViewer method runs with an elevated privilaged SPWeb and UnsafeUpdates set to true. I've created a series of extension methods to handle this for me. (If your'e a bit confused about this, see the helpful links section at the bottom of this page for more information.)
In order to create and render a cross-site list, you'll simply need to include the WebId, ListName, ListId and ViewGuid properties. Personally thought it might be a bit more complex, but that was it...
Since the toolbar itself becomes way too much of a problem in its complexity, I've decided not to display it. All the elements inside the list can still be served by its dropdown menu, but unfortunately not the Ribbon. If you're in dire need of this functionality, happy hunting, and do drop me a line if you've figured it out! ;-)
Conclusion
So there it is. Hope this will give you some ideas on your own version of a custom XsltListViewWebPart, that supports cross-site lookups, and have the ability to have custom XSL applied to it (see below).
Important and Useful Links:
Nothing too special here. Give the user the ability to select a Web, List and View combination, plus the option to show or hide the "Add new item" link.
// User can set the WebId
public string WebId { get; set; }

// User can set the ListId
public string ListId { get; set; }

// User can set the ViewId
public string ViewId { get; set; }

// User can set a custom XslFile path
public string XslLink { get; set; }

// User can choose to display the "Add item" link
public bool HideAddLink { get; set; }

// Check if all requirements are met to display the "Add item" link
private bool HasValidButtonProperties
{
 get
 {
  return base.HasWebIdAndListIdAndViewId && !this.HideAddLink;
 }
}

// Unique key generation
private string OpenScriptedDialog
{
 get
 {
  return string.Format("OpenXsltListViewerControl{0}", this.ClientID);
 }
}

// Use panel/updatepanel to add the XsltListViewWebPart
protected UpdatePanel updatePanel;
protected Panel panel;
 |
| OOTB not working? Aaaaaaargh! |
- Overriding the presentation of an XSLT List View Web Part
- XLV Bug: XSL Link Property and the ECB Menu
The only real override to take note of, the the CreateChildControls method. Here I use a few helper functions to render all the plumbing necessary for the SP.UI.ModelDialog. This is needed to display the "Add new item" dialog. I've used a series of fixed values, but obviously you can make them all dynamic and have the user set them in your EditorPart.
protected override void OnInit(EventArgs e)
{
 // Init update panel
 updatePanel = new UpdatePanel();
 updatePanel.ChildrenAsTriggers = true;
 updatePanel.UpdateMode = UpdatePanelUpdateMode.Conditional;
 updatePanel.ID = string.Format("updatePanel_{0}", this.ClientID);

 // Init panel
 panel = new Panel();

 base.OnInit(e);
}

protected override void CreateChildControls()
{
 // WebPart base ensures selected variables
 base.CreateChildControls();

 // Register Scripts
 StringBuilder sb = new StringBuilder();

 if (HasValidButtonProperties)
 {
  // Use helper function to inject javascript for the SP.UI.ModalDialog add functionality
  sb.Append(SPUtilities.GetModalDialogScript(this.ListId + "/NewForm.aspx",
              "New Item",
              625,
              525,
              this.OpenScriptedDialog));
 }
 // Helper function to register script
 base.RegisterScript(base.UniqueScriptsKey, sb.ToString());

 // Add the control to the controls collection, not the panel,
 // this will ensure that the "Add link" is shown at the bottom of the control.
 if (HasValidButtonProperties)
 {
  Use a helper function to render the "Add link"
  this.Controls.Add(new LiteralControl(SPUtilities.GetModalDialogAddButton(this.OpenScriptedDialog)));
 }
}

protected override void OnLoad(EventArgs e)
{
 RefreshXsltListViewer();
 base.OnLoad(e);
}
I've included the SP.UI.ModelDialog helper functions. They're all but perfect (but works!), so feel free to dice and slice them according to your own needs. Again I've included them just to give you an idea of what I've done.
// Method injects javascript to handle the SP.UI.ModalDialog functions
public static string GetModalDialogScript(string url, string title, int width, int height, string functionName)
{
var sb = new StringBuilder();
var _width = width > 0 ? width : 625;
var _height = height > 0 ? height : 325;
sb.Append(" ");
return sb.ToString();
}
// Method renders the 'Add new item link'
public static string GetModalDialogAddButton(string addLinkKey)
{
return GetModalDialogAddButton(addLinkKey, string.Empty);
}
// Method renders the 'Add new item link'
public static string GetModalDialogAddButton(string addLinkKey, string addLinkText)
{
if (string.IsNullOrEmpty(addLinkKey))
return string.Empty;
if (string.IsNullOrEmpty(addLinkText))
addLinkText = "Add new item";
StringBuilder sb = new StringBuilder();
sb.Append("<table width='100%'>");
sb.Append(" <tr>");
sb.Append(" <td class='ms-partline'>");
sb.Append(" <img height='1' width='1' alt='' src='/_layouts/images/blank.gif'>");
sb.Append(" </td>");
sb.Append(" </tr>");
sb.Append(" <tr>");
sb.Append(" <td style='padding-bottom: 3px' class='ms-addnew'>");
sb.Append(" <span class='s4-clust' style='height:10px;width:10px;position:relative;display:inline-block;overflow:hidden;'>");
sb.Append(" <img style='left:-0px !important;top:-128px !important;position:absolute;' alt='' src='/_layouts/images/fgimg.png'>");
sb.AppendFormat(" </span> <a href='javascript:{0}()'>{1}</a>", addLinkKey, addLinkText);
sb.Append(" </td>");
sb.Append(" </tr>");
sb.Append("</table>");
return sb.ToString();
}
So here comes the juicy bits. First its important to notice that the CreateXsltListViewer method runs with an elevated privilaged SPWeb and UnsafeUpdates set to true. I've created a series of extension methods to handle this for me. (If your'e a bit confused about this, see the helpful links section at the bottom of this page for more information.)
private void RefreshXsltListViewer()
{
  // Run the CreateXsltListViewer method with an
  // elveated privilaged web, that also caters for
  // unsafe-updates.
  SPWeb web = SPContext.Current.Site.OpenWeb(WebId);
  web.UnsafeUpdate(CreateXsltListViewer);
}

private void CreateXsltListViewer(SPWeb web)
{
 // Use helper function to get the SPList
 SPList list = SPUtilities.GetSPList(ListId);

 // Use list acquired from AllowUnsafeUpdates web
 SPList viewList = web.Lists[list.ID];

 // Create the control
 XsltListViewWebPart xsltControl = CreateXsltListViewerInstance(viewList, ViewId);

 // Add control to the update panel
 if (xsltControl != null)
 {
  panel.Controls.Add(xsltControl);
 }
 else
 {
  panel.Controls.Add(new LiteralControl("There was an error creating the XsltListViewer."));
 }
}

private XsltListViewWebPart CreateXsltListViewerInstance(SPList list, string viewName)
{
 XsltListViewWebPart xsltListViewWebPart = new XsltListViewWebPart();

 // First check if view acutally exists
 if (list.Views.Exists(viewName))
 {
  SPView defaultView = list.Views[viewName];

  xsltListViewWebPart.ID = "wpListView";
  // We're displaying this WebPart inside a WebPart. Disable the
  // XsltListViewWebPart's own Title and ChromeType.
  xsltListViewWebPart.Title = string.Empty;
  xsltListViewWebPart.ChromeType = System.Web.UI.WebControls.WebParts.PartChromeType.None;

  // Set all these properties to allow for Cross-Site lookups
  xsltListViewWebPart.WebId = list.ParentWeb.ID;
  xsltListViewWebPart.ListName = list.ID.ToString("B").ToUpper();
  xsltListViewWebPart.ListId = list.ID;
  xsltListViewWebPart.ViewGuid = defaultView.ID.ToString("B").ToUpper();

  // If required, set the XSL file link
  if (!string.IsNullOrEmpty(XslLink))
  {
   xsltListViewWebPart.XslLink = this.XslLink;
  }

  defaultView.Update();

  // I never show the toolbar
  SetToolbarType(xsltListViewWebPart, "None");
 }

 return xsltListViewWebPart;
}

public void SetToolbarType(XsltListViewWebPart lvwp, string viewType)
{
 try
 {
  MethodInfo ensureViewMethod = lvwp.GetType().GetMethod("EnsureView", BindingFlags.Instance | BindingFlags.NonPublic);
  object[] ensureViewParams = { };
  ensureViewMethod.Invoke(lvwp, ensureViewParams);
  FieldInfo viewFieldInfo = lvwp.GetType().GetField("view", BindingFlags.NonPublic | BindingFlags.Instance);
  SPView view = viewFieldInfo.GetValue(lvwp) as SPView;
  Type[] toolbarMethodParamTypes = { Type.GetType("System.String") };
  MethodInfo setToolbarTypeMethod = view.GetType().GetMethod("SetToolbarType", BindingFlags.Instance | BindingFlags.NonPublic, null, toolbarMethodParamTypes, null);
  object[] setToolbarParam = { viewType }; //set the type here
  setToolbarTypeMethod.Invoke(view, setToolbarParam);
  view.Update();
 }
 catch { }
}
So there it is. Hope this will give you some ideas on your own version of a custom XsltListViewWebPart, that supports cross-site lookups, and have the ability to have custom XSL applied to it (see below).

Important and Useful Links:
- Elegant SPSite Elevation by Keith Dahlby
- Best practices for RunWithElevatedPrivileges on StackOverflow
- XSLTListViewWebpart in Sharepoint 2010 Uncovered by Sunil Singhal
- Cross-Site (Web) XsltListViewWebPart by Thomas Zepeda McMillan
- Programmatically enable Ajax Auto Refresh on a SharePoint XsltListViewWebPart by Brian Cartmel
Friday, August 24, 2012
401 Error (Unauthorized) When Accessing SharePoint Web Services
We've created application helper classes that accesses all SharePoint lists via the integrated web services (/_vti_bin/*.asmx). One of the miserable errors we sometimes get when moving through the deployment stages (Development, QA then Production) is that, even with administrative privileges, we still get a 401 Unauthorized error.
Our code goes something like this:
The way we fix this is by either specifying the host names or disabling the loopback check and EACH of the application servers. See this post for more details.
Important and Useful Links:
Our code goes something like this:
protected WebServiceSPLists.Lists _lists;
const string CClassName = "DataContextSharePointList";

private string GetListNameByTitle(Connection connection, string listTitle)
{
 const string CProcName = "GetListNameByTitle";
 string response = "";
 XmlNode listsNode;
 XmlNode node;

 try
 {
  this.InitConnection(connection);
  _lists.Credentials = ((Connection)connection).Credentials;
  _lists.Url = ((Connection)connection).SiteUrl + "/_vti_bin/lists.asmx";
  Trace.Write(CClassName, CProcName, "GetListCollection");
  listsNode = _lists.GetListCollection();    // <-- 401 error occurs here
  Trace.Write(CClassName, CProcName, "GetListCollection OK");

  // Code omitted //
 }
 catch (Exception ex)
 {
  Trace.Write(CClassName, CProcName, "Error: " + ex.Message);
 }
}
The way we fix this is by either specifying the host names or disabling the loopback check and EACH of the application servers. See this post for more details.
Important and Useful Links:
- You receive error 401.1 when you browse a Web site that uses Integrated Authentication and is hosted on IIS 5.1 or a later version by Microsoft Support
- How to resolve (401) Unauthorized error for SharePoint web service call from Infopath Webbased form? by Harry Chen
Upgrading SharePoint Content Types: General Guidelines, Ideas and Issues.
Microsoft introduced the "SharePoint Content Type Lifecycle Management" for better management of already deployed content types. Although simple in theory, in practice there are a number of issues to be aware of.
The whole process of upgrading the Content Type Feature is done by following these steps.
(a) Create the New Fields.
 Personally I prefer to keep my Field Definitions elements.xml separate to my Content Type elements.xml. So whenever I update an existing project, I simply slot in a new manifest with all the new Field definitions (as per version).
Some prefer to add the new FieldRefs into the existing Content Types manifest, but this is not necessary. However, this does make life simpler for new deployments.
In my example I've created a new Managed Metadata Field:
If you prefer to add the FieldRef to the Content Type, it would look something similar to this:
(b) Modify the Existing Feature Element Manifest.
Now comes the bulk of the work. Update the existing content type deployment feature, by adding the UpgradeActions element to the manifest. Right off the bat I can tell you that the intended functionality doesn't exactly work as intended. By adding the PushDown="TRUE" property to the AddContentTypeField element, the Upgrade should push the added Fields down to any inheriting Content Types from Sites below the Parent. This does not work.
The only way I got this working was by following Charles Chen's method of adding a CustomUpgradeAction and forcing the pushdown. His excellent blog on SharePoint Content Type Lifecycle Management can be found here. In his post, he explains that by deleting and re-adding the Field to the Content Type, the Field is finally pushed down.
So basically, my UpgradeActions element looks something like this:
The code from my ReceiverClass looks very similar to the one described in Chen's article, so I'm not going to repeat it here.
TIP : When adding the ReceiverClass via Visual Studio, the class references is automatically added to the <Feature> element and not the <UpgradeActions> element. I could'nt trap any of my System.Diagnostic Traces in DebugView, and found that moving the ReceiverAssembly and ReceiverClass references manually to the <UpgradeActions> element was the only way I could get this working. Does this indeed matter, or did I stuff up? Comments welcome!
 What is important however is to keep the version numbering constant. In my case, the Version range starts with "0.0.0.0" (since I didn't include a version number with my original deployment) to "1.0.0.0". Remember to set your Features' version number before packaging!
(c) Deploy the Update
After packaging, deploy the feature by whichever way is your poison. My preferred method is a simple PowerShell cmdlet:
 Be sure to check the 14-hive that your feature was indeed deployed!
(d) Activate the Upgrade
This is the part where everybody runs into issues [duh!]. After updating, the only way to enable the Feature Upgrade, is to get access to the QueryFeatures [SPFeatureQueryResultCollection] collection, and upgrade the features via their object model.
Two common way's we can accomplish this. Either via C# code, or via a PowerShell cmdlet. a Simple C# console application might look something like this :
Or via a PowerShell cmdlet:
TIP : I ran into an issue where I update my upgraded feature, but couldn't access the feature via my PowerShell cmdlet (see above). The QueryFeatures (true) collection simply did'nt return any of my upgraded features. To make matters worse, this was a random occurrence. Sometimes everything ran perfectly smooth, and sometimes, no luck. After 2 days of hair pulling I finally got to the actual reason... I normally run the Update PowerShell cmdlet from the SharePoint 2010 Management Shell. When the update completes, I run the Upgrade cmdlet from the SAME SHELL WINDOW. This is when QueryFeatures "returns nothing". Took me 2 whole days to figure out that the workaround this is to simply CLOSE THE SHELL WINDOW, and reopen it. Voila. My Upgraded feature starts showing up, and are ready for upgrading... [facepalm!].
So that's how I got Content Type Upgrading working. The client is happy, and my hair is coming back nicely.
Happy programming!
Important and Useful Links:
(a) Create the New Fields.
Some prefer to add the new FieldRefs into the existing Content Types manifest, but this is not necessary. However, this does make life simpler for new deployments.
In my example I've created a new Managed Metadata Field:
  <Field ID="{498D906E-1C7F-4493-8F28-3400654F4292}"
  Name="ArtifactClassification"
  StaticName="ArtifactClassification"
  DisplayName="Classification"
  Group="CII Projects Columns"
  Type="TaxonomyFieldType"
  ShowField="Term1033"
  EnforceUniqueValues="FALSE"
  Required="TRUE"
  Overwrite="TRUE"
  DisplaceOnUpgrade="TRUE">
    <Customization>
      <ArrayOfProperty>
        <Property>
          <Name>TextField</Name>
          <Value xmlns:q6="http://www.w3.org/2001/XMLSchema" p4:type="q6:string" xmlns:p4="http://www.w3.org/2001/XMLSchema-instance">{CFB09262-ED43-45b0-9E4F-A44D5256858C}</Value>
        </Property>
      </ArrayOfProperty>
    </Customization>
  </Field>
  <Field ID="{CFB09262-ED43-45b0-9E4F-A44D5256858C}"
    Name="ArtifactClassificationTaxHTField0"
    StaticName="ArtifactClassificationTaxHTField0"
    DisplayName="Classification_0"
    Group="CII Projects Columns"
    Type="Note"
    ShowInViewForms="FALSE"
    Required="FALSE"
    DisplaceOnUpgrade="TRUE"
    Overwrite="TRUE"
    Hidden="TRUE"
    CanToggleHidden="TRUE"
    RowOrdinal="0">
  </Field>
If you prefer to add the FieldRef to the Content Type, it would look something similar to this:
<ContentType ID="0x01010008a7b1b7ae814926b4a6a7754d7f9d08"
     Name="CII Projects Document Artifact"
     Group="CII Projects Content Types"
     Description="The CII Projects Document Artifact Content Type."
     Inherits="TRUE"
     Overwrite="TRUE"
     Version="0">
<FieldRefs>
<!-- FieldRefs omitted -->
    <FieldRef ID="{498D906E-1C7F-4493-8F28-3400654F4292}" Name="ArtifactClassification" Required="TRUE" DisplayName="Classification"/>
    <FieldRef ID="{CFB09262-ED43-45b0-9E4F-A44D5256858C}" Name="ArtifactClassificationTaxHTField0" />
</FieldRefs>
</ContentType>
(b) Modify the Existing Feature Element Manifest.
Now comes the bulk of the work. Update the existing content type deployment feature, by adding the UpgradeActions element to the manifest. Right off the bat I can tell you that the intended functionality doesn't exactly work as intended. By adding the PushDown="TRUE" property to the AddContentTypeField element, the Upgrade should push the added Fields down to any inheriting Content Types from Sites below the Parent. This does not work.
The only way I got this working was by following Charles Chen's method of adding a CustomUpgradeAction and forcing the pushdown. His excellent blog on SharePoint Content Type Lifecycle Management can be found here. In his post, he explains that by deleting and re-adding the Field to the Content Type, the Field is finally pushed down.
So basically, my UpgradeActions element looks something like this:
<UpgradeActions
    ReceiverAssembly="CII.Projects.Provisioning, Version=1.0.0.0, Culture=neutral, PublicKeyToken=5442323e733bd5e1"
    ReceiverClass="CII.Projects.Provisioning.Features.CIIProjects_Provisioning.CIIProjects_ProvisioningEventReceiver">
    <VersionRange BeginVersion="0.0.0.0" EndVersion="1.0.0.0">
      <ApplyElementManifests>
        <ElementManifest Location="CIIProjects_Fields_v2\Elements.xml"/>
      </ApplyElementManifests>
      <AddContentTypeField ContentTypeId="0x01010008a7b1b7ae814926b4a6a7754d7f9d08" FieldId="{498D906E-1C7F-4493-8F28-3400654F4292}" PushDown="TRUE"/>
      <AddContentTypeField ContentTypeId="0x01010008a7b1b7ae814926b4a6a7754d7f9d08" FieldId="{CFB09262-ED43-45b0-9E4F-A44D5256858C}" PushDown="TRUE"/>
      <CustomUpgradeAction Name="AddFields">
          <Parameters>
             <Parameter Name="add.field.1">0x01010008a7b1b7ae814926b4a6a7754d7f9d08,{498D906E-1C7F-4493-8F28-3400654F4292}</Parameter>
             <Parameter Name="add.field.2">0x01010008a7b1b7ae814926b4a6a7754d7f9d08,{CFB09262-ED43-45b0-9E4F-A44D5256858C}</Parameter>
          </Parameters>
      </CustomUpgradeAction>
    </VersionRange>
</UpgradeActions>
The code from my ReceiverClass looks very similar to the one described in Chen's article, so I'm not going to repeat it here.
TIP : When adding the ReceiverClass via Visual Studio, the class references is automatically added to the <Feature> element and not the <UpgradeActions> element. I could'nt trap any of my System.Diagnostic Traces in DebugView, and found that moving the ReceiverAssembly and ReceiverClass references manually to the <UpgradeActions> element was the only way I could get this working. Does this indeed matter, or did I stuff up? Comments welcome!

(c) Deploy the Update
After packaging, deploy the feature by whichever way is your poison. My preferred method is a simple PowerShell cmdlet:
Update-SPSolution -GACDeployment -Identity "CII.Projects.Provisioning.wsp" -LiteralPath "E:\Deployment\SharePoint\CII\Projects\CII.Projects.Provisioning.wsp"

(d) Activate the Upgrade
This is the part where everybody runs into issues [duh!]. After updating, the only way to enable the Feature Upgrade, is to get access to the QueryFeatures [SPFeatureQueryResultCollection] collection, and upgrade the features via their object model.
Two common way's we can accomplish this. Either via C# code, or via a PowerShell cmdlet. a Simple C# console application might look something like this :
static void Main(string[] args)
{
 using (SPSite currentSite = new SPSite("http://server"))
 {
  foreach (SPFeature feature in currentSite.QueryFeatures(SPFeatureScope.Site, true))
  {
   Console.WriteLine("Feature found : " + feature.DefinitionId.ToString());
   if (feature.Upgrade(true) != null)
   {
    Console.WriteLine("Upgrade " + feature.Definition.Name + " FAILED!");
   }
   else
   {
    Console.WriteLine("Upgrade " + feature.Definition.Name + " UPGRADED!");
   }
  }
 }
 Console.WriteLine("Press Enter to Continue...");
 Console.ReadLine();
}
Or via a PowerShell cmdlet:
# This (as per 1000's of other examples) I couldn't get working
$featuresToUpgrade = $site.QueryFeatures("Site", $true)
foreach ($f in $featuresToUpgrade)
{
    Write-Host -ForegroundColor Yellow "Upgrading feature " $f.Definition.DisplayName -NoNewline
    $f.Upgrade( $false )
    Write-Host -ForegroundColor Green " DONE"
}

# This worked
foreach ($f in $site.QueryFeatures("Site", $true)) {
   Write-Host -ForegroundColor Yellow "Upgrading feature " $f.Definition.DisplayName -NoNewline
   $f.Upgrade( $true )
   Write-Host -ForegroundColor Green " DONE"
}
TIP : I ran into an issue where I update my upgraded feature, but couldn't access the feature via my PowerShell cmdlet (see above). The QueryFeatures (true) collection simply did'nt return any of my upgraded features. To make matters worse, this was a random occurrence. Sometimes everything ran perfectly smooth, and sometimes, no luck. After 2 days of hair pulling I finally got to the actual reason... I normally run the Update PowerShell cmdlet from the SharePoint 2010 Management Shell. When the update completes, I run the Upgrade cmdlet from the SAME SHELL WINDOW. This is when QueryFeatures "returns nothing". Took me 2 whole days to figure out that the workaround this is to simply CLOSE THE SHELL WINDOW, and reopen it. Voila. My Upgraded feature starts showing up, and are ready for upgrading... [facepalm!].
So that's how I got Content Type Upgrading working. The client is happy, and my hair is coming back nicely.
Happy programming!
Important and Useful Links:
- SharePoint Content Type Lifecycle Management by Charles Chen.
- Feature upgrade series by Chris O' Brien
- SharePoint: QueryFeatures issue when performing a feature upgrade by Octavie van Haaften
Subscribe to:
Posts (Atom)